Getting Started with Qubes OS
Note: This guide assumes that you’ve just installed Qubes for the first time. The installation guide for your Qubes release can be found on the Downloads page.
Now that you’ve installed Qubes, let’s cover some basic concepts.
AppVMs (Domains) and TemplateVMs
In Qubes, you run all your programs in domains. Domains are also called AppVMs because they’re implemented as lightweight virtual machines (VMs). Not every app runs in its own VM. (That would be a big waste of resources!) Instead, each VM represents a security domain (e.g., “work,” “personal,” “banking,” etc.). Each domain is based, by default, on a single, common TemplateVM (but you can create as many as you’d like). This means that when you create a new AppVM, you don’t copy the whole root filesystem needed for this AppVM to work (which would include copying all the programs). Instead, each AppVM shares the root filesystem with its respective TemplateVM. An AppVM has read-only access to the filesystem of the Template on which it’s based, so an AppVM cannot modify a TemplateVM in any way. This is important, as it means that if an AppVM is ever compromised, the TemplateVM on which it’s based (and any other AppVMs based on that TemplateVM) will still be safe. This means that creating a large number of domains is cheap: Each one needs only as much disk space as is necessary to store its private files (e.g., the “home” folder).
If you’ve installed Qubes using the default options, a few domains have already been created for you:
- work
- personal
- untrusted
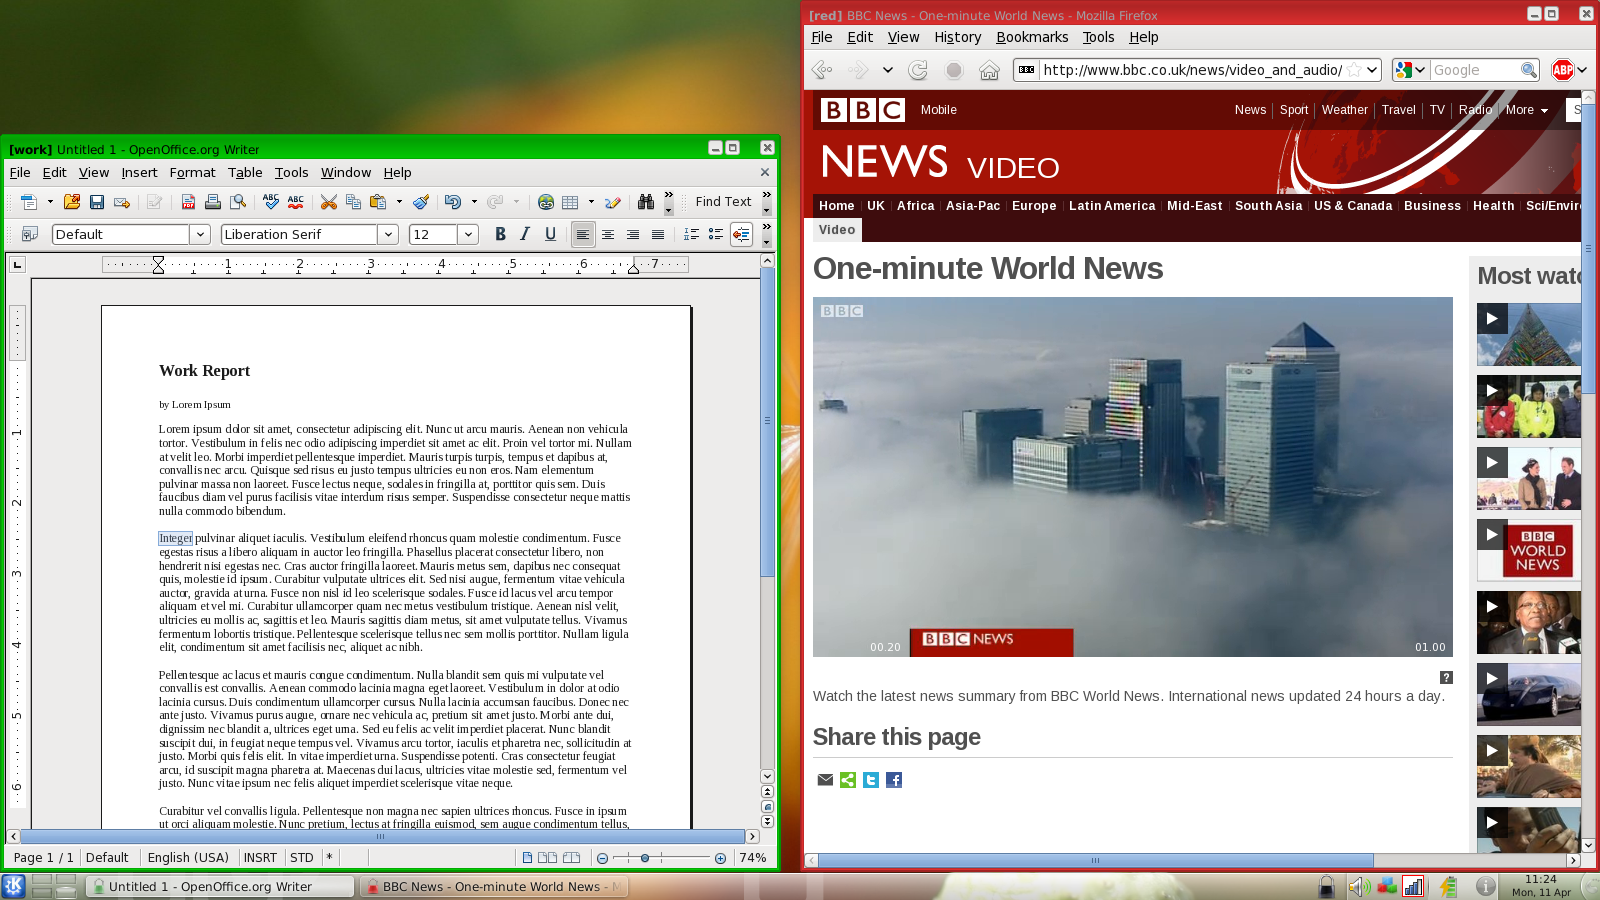
Each domain, apart from having a distinct name, is also assigned a label, which is one of several pre-defined colors. The trusted window manager uses these colors in order to draw window decorations (color frames) around the windows of applications running in each domain. These allow you to quickly and easily identify the trust level of a given window at a glance. It’s totally up to you how you’d like to interpret these colors. Personally, I find it natural to associate red with that which is untrusted and dangerous (the “red light” – stop! danger!), green with that which is safe and trusted, and yellow and orange with things in the middle. I’ve also extended this scheme to include blue and black, which I interpret as indicating progressively more trusted domains than green, with black being ultimately trusted.
In addition to AppVMs and TemplateVMs, there’s one special domain called “dom0,” which is where the Desktop Manager runs. This is where you log in to the system. Dom0 is more trusted than any other domain (including TemplateVMs and black-labeled domains). If dom0 were ever compromised, it would be Game OverTM. (The entire system would effectively be compromised.) Due to its overarching importance, dom0 has no network connectivity and is used only for running the Window and Desktop Managers. Dom0 shouldn’t be used for anything else. In particular, you should never run user applications in dom0. (That’s what your AppVMs are for!)
Qubes VM Manager and Command Line Tools
All aspects of the Qubes system can be controlled using command line tools run under a dom0 console. To open a console window in dom0, either go to Start->System Tools->Konsole or press Alt-F2 and type konsole.
Various command line tools are described as part of this guide, and the whole reference can be found here.
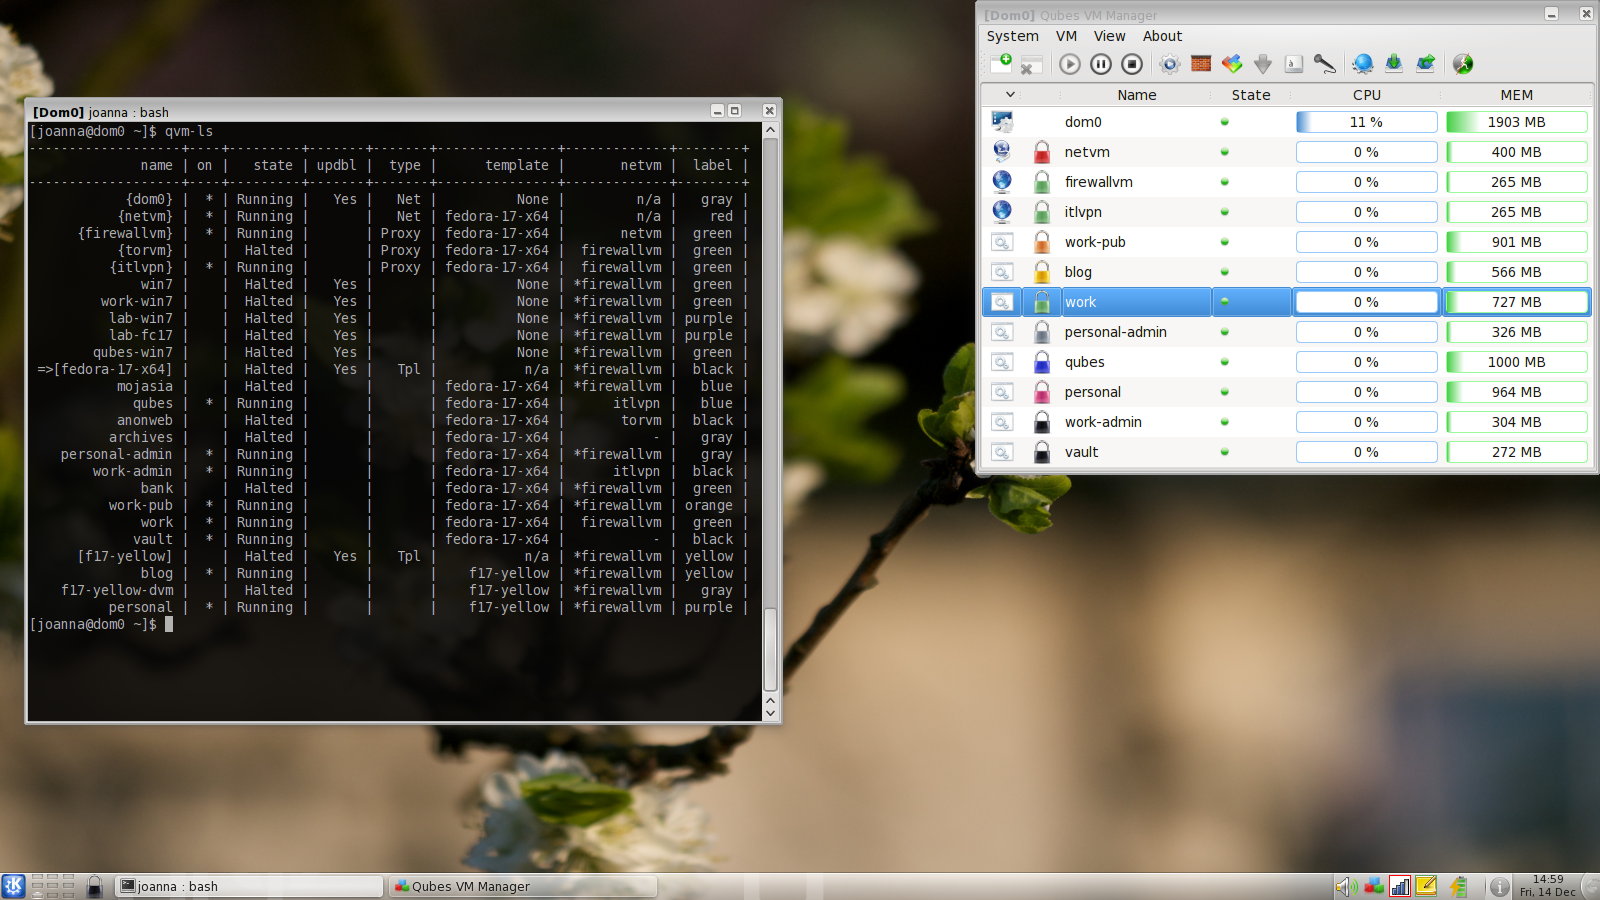
Alternatively, you can use a rather intuitive GUI tool called Qubes VM Manager. It supports most of the functionality that command line tools provide. The Qubes VM Manager starts and opens automatically when Qubes starts up, but you can also start it by going to Start->System Tools->Qubes Manager. Once the Qubes VM Manager is running, you can open the window at any time by clicking on the Qubes tray icon, which typically resides in the bottom-right corner of the screen.
Starting Apps in Domains
Apps can be started either by using the shortcuts in the Desktop Manager’s menu or by using the command line (i.e., a console running in dom0).
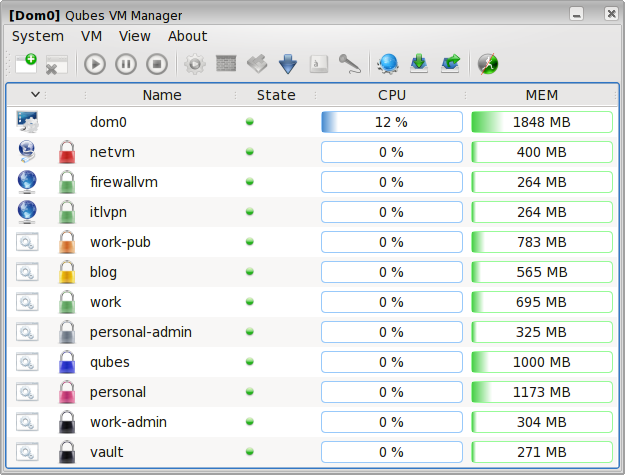
You can start apps directly from the start menu. Each domain has its own menu directory under the scheme Domain: <name>. After navigating into one of these directories, simply click on the application you’d like to start:

By default, each domain’s menu contains only a few shortcuts. If you’d like to add more, simply click Add more shortcuts…, select the desired applictions, and click OK. You can also add shortcuts manually. (This is sometimes necessary if the desired application doesn’t show up in the Qubes VM Manager window.) To do this in KDE, right-click on the Start button and click Menu Editor. Click the domain directory in which you’d like the menu to appear, click New Item, enter its name as <domain name>: <app name>, and provide the command for starting the app (see below). Then click Save and wait approximately 15 seconds for the changes to propagate to the KDE menu.
To start apps from the console in dom0, type:
qvm-run -a <domain> "<app name> [arguments]"e.g.:
qvm-run -a red firefoxAdding, Removing, and Listing Domains
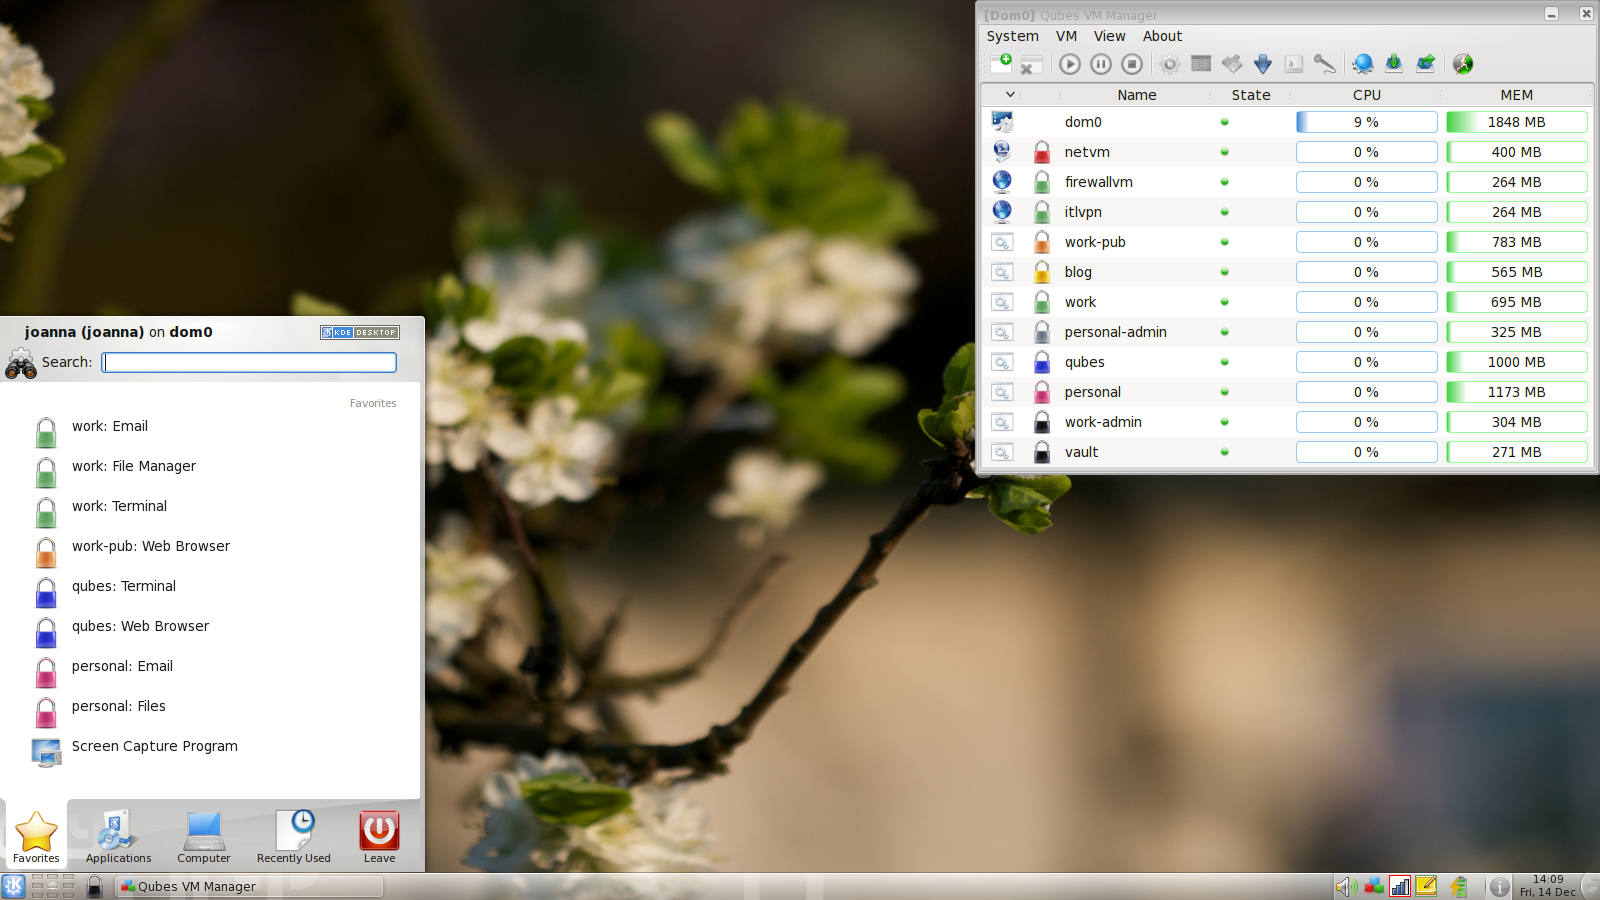
Domains can easily be added and removed by clicking on the Add and Remove buttons in the Qubes VM Manager.
Domains can also be added, removed, and listed from command line (i.e., a console running in dom0) using the following tools:
qvm-createqvm-removeqvm-ls
How Many Domains Do I Need?
That’s a great question, but there’s no one-size-fits-all answer. It depends on the structure of your digital life, and this is at least a little different for everyone. If you plan on using your system for work, then it also depends on what kind of job you do.
It’s a good idea to start out with the three domains created automatically by the installer: work, personal, and untrusted. Then, if and when you start to feel that some activity just doesn’t fit into any of your existing domains, you can easily create a new domain for it. You’ll also be able to easily copy any files you need to the newly created domain, as explained here.
More paranoid people might find it worthwhile to read this article, which describes how one of the Qubes authors partitions her digital life into security domains.
Full Screen Domains
By default, Qubes doesn’t allow any application window to occupy the entire screen such that its window name (which includes the name of the domain to which it belongs) and colored window border are no longer visible. This is a security precaution designed to prevent a situation in which an application which has been allowed to enter full screen mode begins to emulate the entire Qubes system. We want it to be the case that the user is always able to identify which domain is displaying any given window. Otherwise, a compromised domain which is able to occupy the entire screen could trick the user into thinking that she is interacting with a variety of different domains (including dom0), when in fact she is interacting with only a single, compromised domain pretending to be the whole system.
However, if the user makes use of an “expose-like” desktop switcher, such as the “Desktop Grid” effect that is enabled by default under KDE (default activation command: Ctrl-F8), then we can safely allow domains to enter full screen mode, as we have assurance that we can always “preempt” them by hitting the magic key combination (e.g., Ctrl-F8), which will be consumed by the trusted window manager and not passed down to the fullscreen AppVM. This means that the AppVM has no way of effectively “faking” the fullscreen view of the system, as the user can easily identify it as “just another AppVM.” Theoretically, this could be achieved even with primitive Alt-Tab like switching, which should be available on simpler Window Managers (such as Xfce4, which we also support as an alternative dom0 Desktop Environment), but this might be less obvious to the user.
To allow domains to enter full screen mode, one should edit the /etc/qubes/guid.conf file in dom0.
E.g. to allow all domains to enter full screen mode, set allow_fullscreen flag to true in the global section:
global: {
  # default values
  allow_fullscreen = false;
  #allow_utf8_titles = false;
  #secure_copy_sequence = "Ctrl-Shift-c";
  #secure_paste_sequence = "Ctrl-Shift-v";
  #windows_count_limit = 500;
};
To allow only select AppVMs to enter full screen mode, create a per-VM section, and set allow_fullscreen flag there to true:
VM: {
  work: {
   allow_fullscreen = true;
  };

};
In order for the changes to take effect, restart the AppVM(s).
Now that you’re familiar with the basics, feel free to have a look at other Qubes User Guides.