Installing and using Windows-based AppVMs
Qubes provides special support for running Windows-based AppVMs. This requires the user to install Windows 7 x64 in a Qubes VM and subsequently install Qubes Windows Support tools inside the VM. This page describes this process in detail.
Qubes support tools for Windows is a set of programs and drivers that provide integration of Windows AppVMs with the rest of the Qubes system. Currently the following features are available for Windows VMs after installation of those tools:
- Seamless GUI mode that integrates apps windows onto the common Qubes trusted desktop (available on Qubes R2 Beta 3 and later)
- Support for secure clipboard copy/paste between the Windows VM and other AppVMs
- Support for secure file exchange between the Windows VM and other AppVMs
- Support for qvm-run and generic qrexec for the Windows VM (e.g. ability to run custom service within/from the Windows VM)
- Xen PV drivers for Windows that increase performance compared to qemu emulated devices
Qubes Windows Support Tools are not open source and are distributed under a commercial license and their source code is not publicly available. Current status is: Beta.
NOTE: Currently only 64-bit versions of Windows 7 are support by Qubes Windows Tools.
Installing Windows OS in a Qubes VM
Please refer to this page for instructions on how to install Windows in a Qubes VM.
Installing Qubes support tools in Windows 7 VMs
First, make sure that qubes-windows-tools is installed in your system:
sudo qubes-dom0-update qubes-windows-toolsThis package brings the ISO with Qubes Windows Tools that is passed to the VM when --install-windows-tools is specified for the qvm-start command. Please note that even though the Qubes Windows Tools are proprietary, none of this software ever runs in Dom0 or any other part of the system except for the Windows AppVM in which it is to be installed.
To install the Qubes Windows support tools in a Windows VM one should start the VM passing the additional option --install-windows-tools:
qvm-start lab-win7 --install-windows-toolsOnce the Windows VM boots, a CDROM should appear in the ‘My Computer’ menu (typically as D:) with a setup program in its main directory.
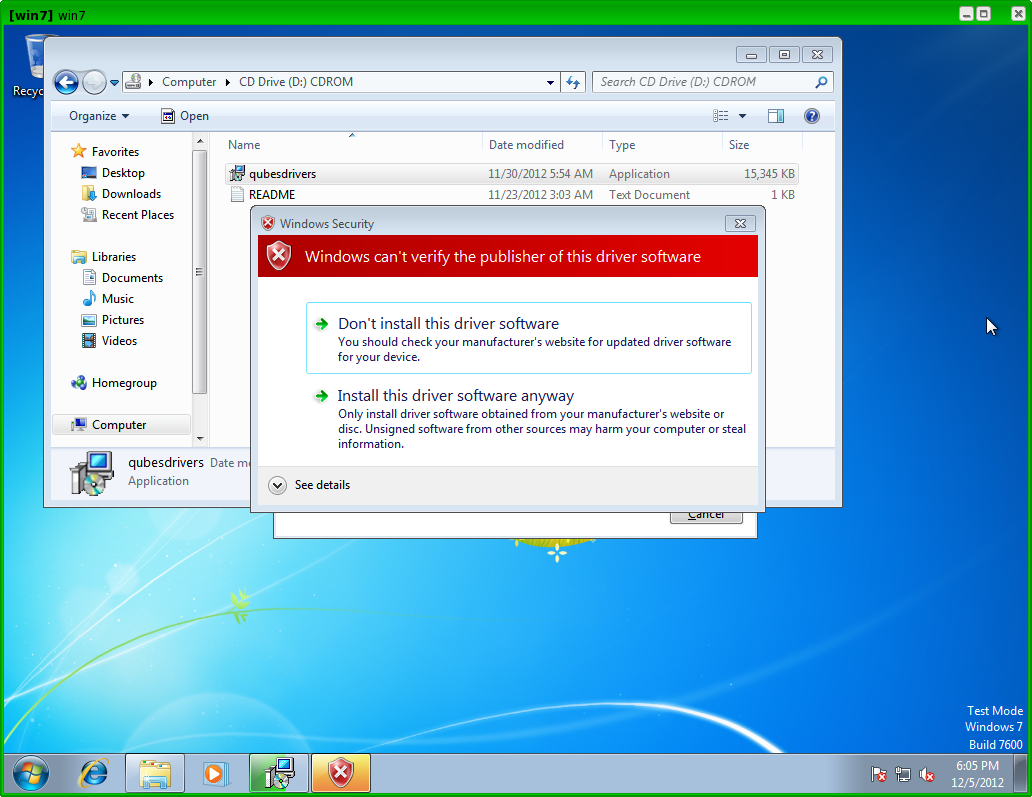
Before proceeding with the installation we need to disable Windows mechanism that allows only signed drivers to be installed, because currently (beta releases) the drivers we provide as part of the Windows Support Tools are not digitally signed with a publicly recognizable certificate. How to do that is explained in the README file also located on the installation CDROM. In the future this step will not be necessary anymore, because we will sign our drivers with a publicly verifiable certificate. However, it should be noted that even now, the fact that those drivers are not digitally signed, this doesn’t affect security of the Windows VM in ‘any’ way. This is because the actual installation ISO (the qubes-windows-tools-*.iso file) is distributed as a signed RPM package and its signature is verified by the qubes-dom0-update utility once it’s being installed in Dom0. The only downside of those drivers not being signed is the inconvenience to the user that he or she must disable the signature enforcement policy before installing the tools, and also to accept a few scary looking warning windows during the installation process, as shown below.
After successful installation, the Windows VM must be shut down and started again.
Qubes (R2 Beta 3 and later releases) will automatically detect the tools has been installed in the VM and will set appropriate properties for the VM, such as qrexec_installed, guiagent_installed, and default_user. This can be verified (but is not required) using qvm-prefs command:
qvm-prefs <your-appvm-name>Using Windows AppVMs in seamless mode (Qubes R2 Beta 3 and later)
Once you start a Windows-based AppVM with Qubes Tools installed, you can easily start individual applications from the VM (note the -a switch used here, which will auto-start the VM if it is not running):
qvm-run -a my-win7-appvm explorer.exe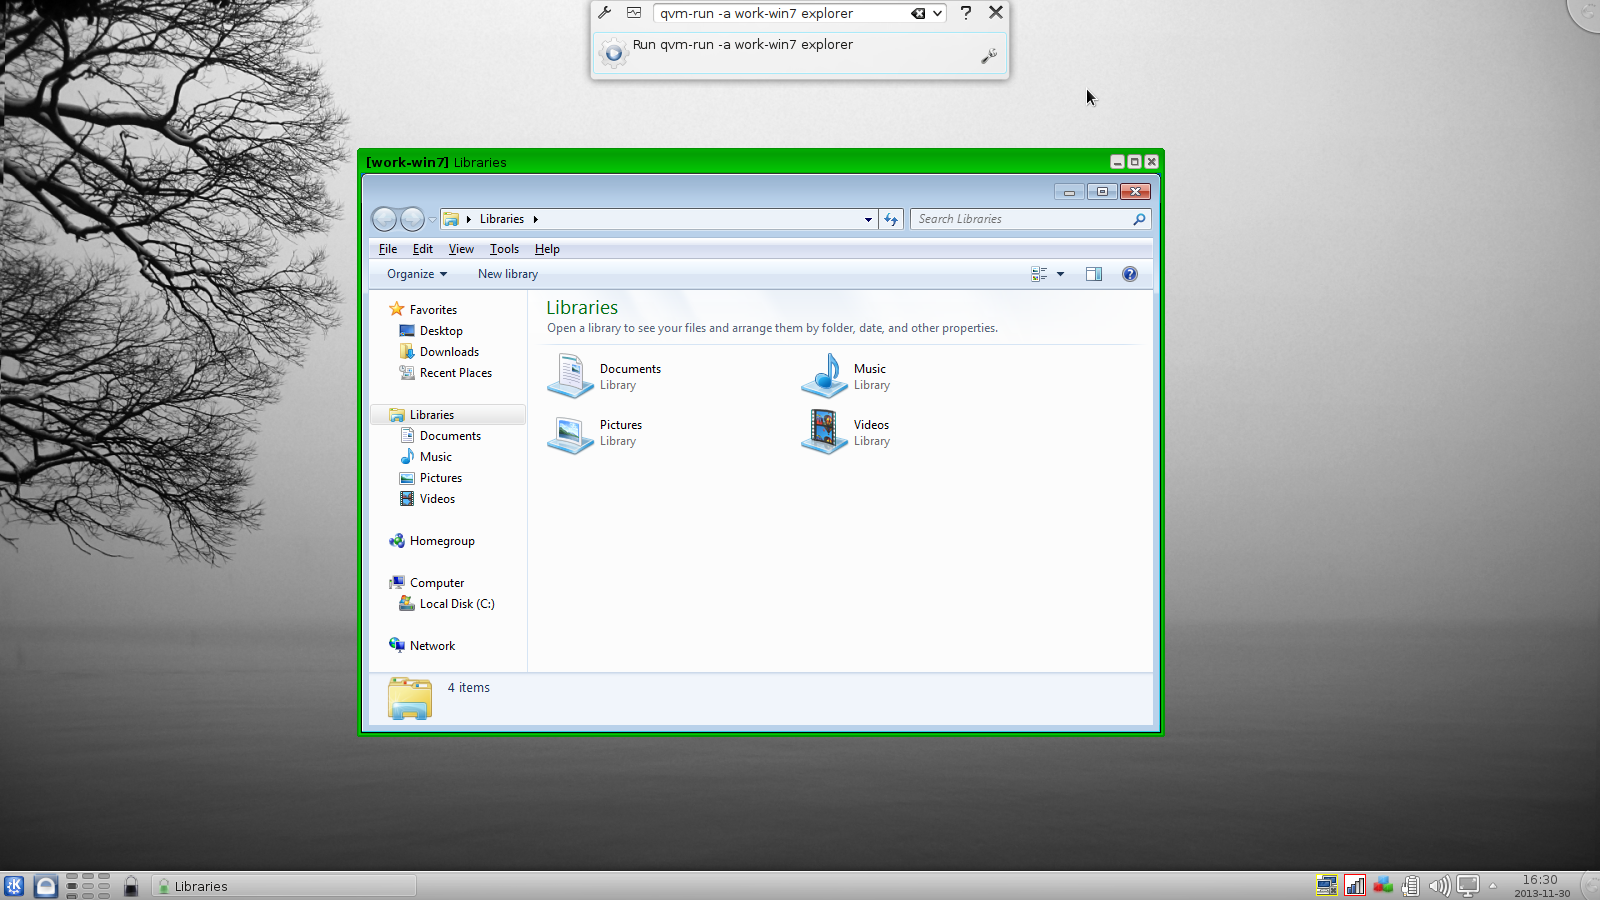
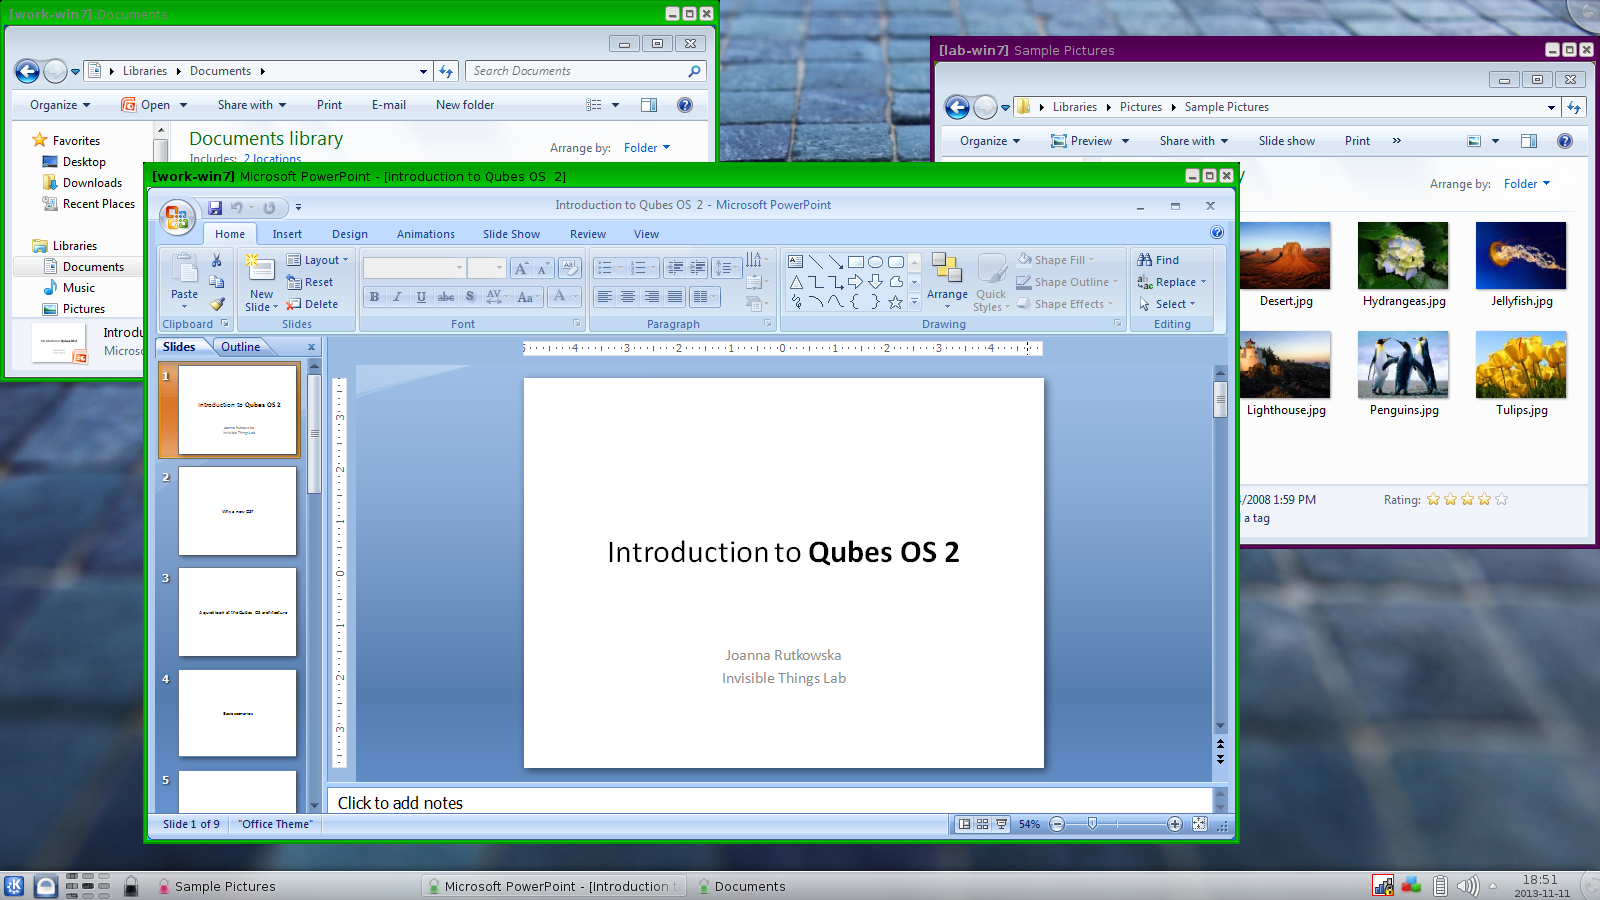
Also, the inter-VM services work as usual – e.g. to request opening a document or URL in the Windows AppVM from another VM:
[user@work ~]$ qvm-open-in-vm work-win7 roadmap.pptx[user@work ~]$ qvm-open-in-vm work-win7 http://www.invisiblethingslab.com… just like in case of Linux AppVMs. Of course all those operations are governed by central policy engine running in Dom0 – if the policy
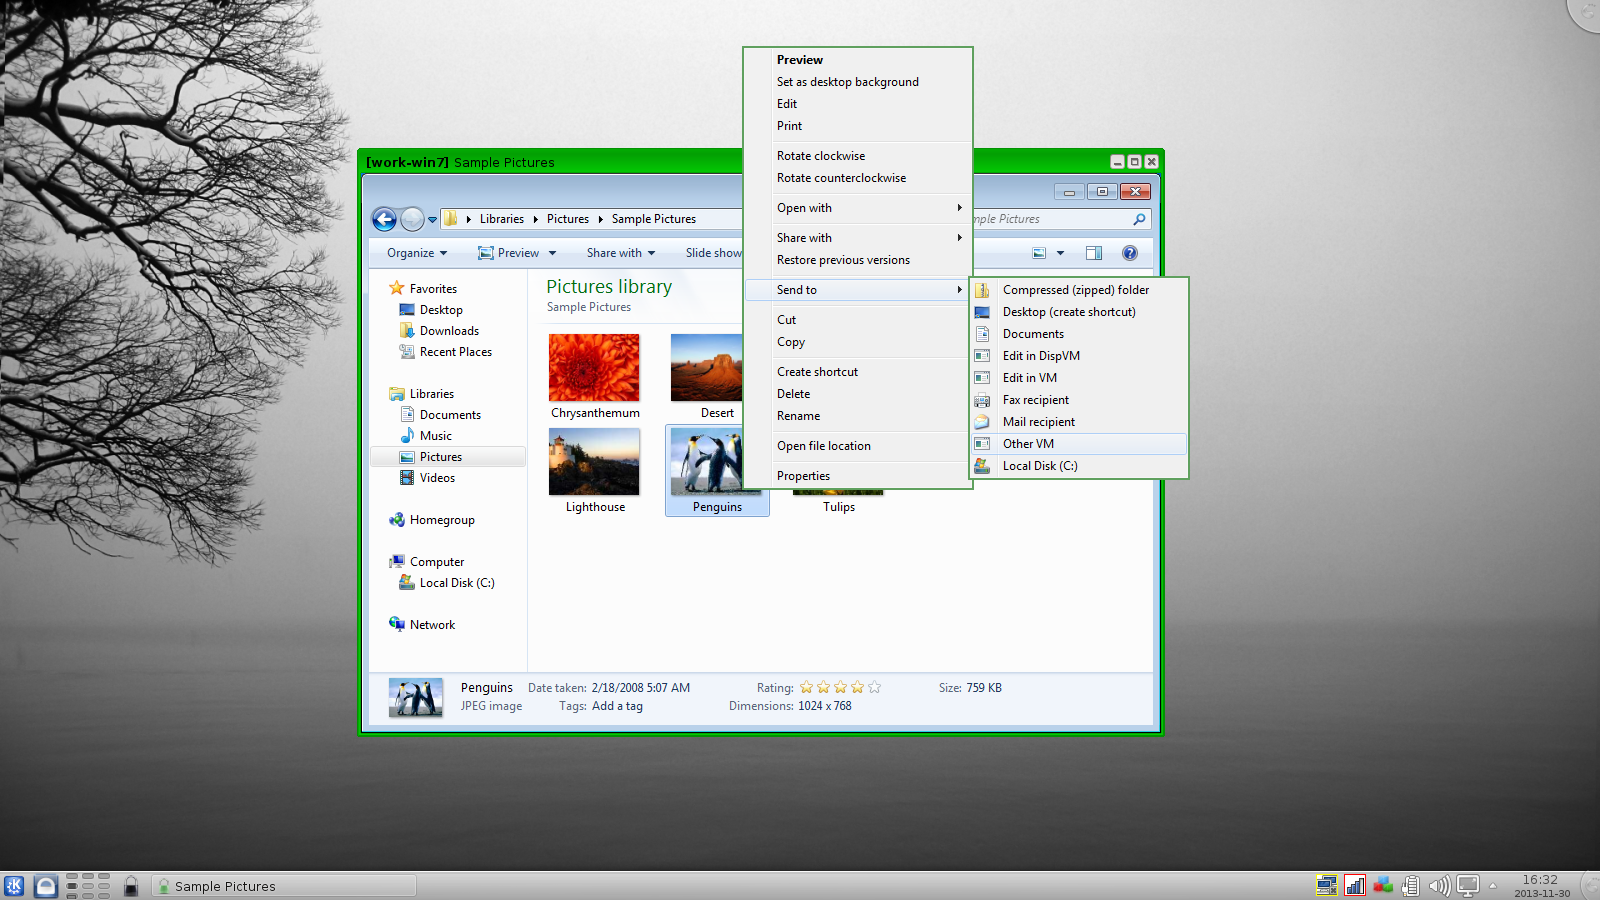
Inter-VM file copy and clipboard works for Windows AppVMs the same way as for Linux AppVM (except that we don’t provide a command line wrapper, qvm-copy-to-vm in Windows VMs) – to copy files from Windows AppVMs just right-click on the file in Explorer, and choose: Send To-> Other AppVM.
To simulate CTRL-ALT-DELETE in the HVM (SAS, Secure Attention Sequence), press Ctrl-Alt-Home while having any window of this VM in the foreground.
Forcing Windows AppVM into full desktop mode
You can switch between seamless and “full desktop” mode for Windows HVMs in their settings in Qubes Manager.
Using template-based Windows AppVMs (Qubes R2 Beta 3 and later)
Qubes allows HVM VMs to share a common root filesystem from a select Template VM, just like it is done for Linux AppVMs. This mode is not limited to Windows AppVMs, and can be used for any HVM (e.g. FreeBSD running in a HVM). In order to create a HVM TemplateVM one can use the following command:
qvm-create --hvm-template win7-x64-template -l green… and install Windows OS (or other OS) into this template the same way as you would install it into a normal HVM – please see this page instructions. However, it would make lots of sense to store the C:\Users directory on the 2nd disk which is automatically exposed by Qubes to all HVMs. This 2nd disk is backed by the private.img file in the AppVMs’ and is not reset upon AppVMs reboot, so the user’s directories and profiles would survive the AppVMs reboot, unlike the “root” filesystem which will be reverted to the “golden image” from the Template VM automatically. To facilitate such separation of user profiles, Qubes Windows Tools provide an option to automatically move C:\Users directory to the 2nd disk backed by private.img. It’s a selectable feature of the installer, enabled by default. If that feature is selected during installation, completion of the process requires two reboots:
- The private disk is initialized and formatted on the first reboot after tools installation. It can’t be done during the installation because Xen mass storage drivers are not yet active.
- User profiles are moved to the private disk on the next reboot after the private disk is initialized. Reboot is required because the “mover utility” runs very early in the boot process so OS can’t yet lock any files in there. This can take some time depending on the profiles’ size and because the GUI agent is not yet active dom0/Qubes Manager may complain that the AppVM failed to boot. That’s a false alarm (you can increase AppVM’s default boot timeout using
qvm-prefs), the VM should appear “green” in Qubes Manager shortly after.
It also makes sense to disable Automatic Updates for all the Windows-based AppVMs – of course this should be done in the Template VM, not in individual AppVMs, because the system-wide setting are stored in the root filesystem (which holds the system-wide registry hives).
Once the template has been created and installed it is easy to create AppVMs based on:
qvm-create --hvm <new windows appvm name> --template <name of template vm> --label <label color>